Sidebar
User Statistics
- Total Users: 1,134
- Latest User: evilmoster
- Online Users: 0
- Users Today: 0
- Users this Week: 0
- Users this Month: 0
- Users this Year: 0
Who's Online
We have 110 guests and no members online
Downloads Stats
Displaying items by tag: Restorator
Custom Photoshop Background
Have you been wondering how you can change thedefault background and how to add a custom background.
WMP 12 Custom Background
Have you been wondering how you can change thedefault background and how to add a custom background.
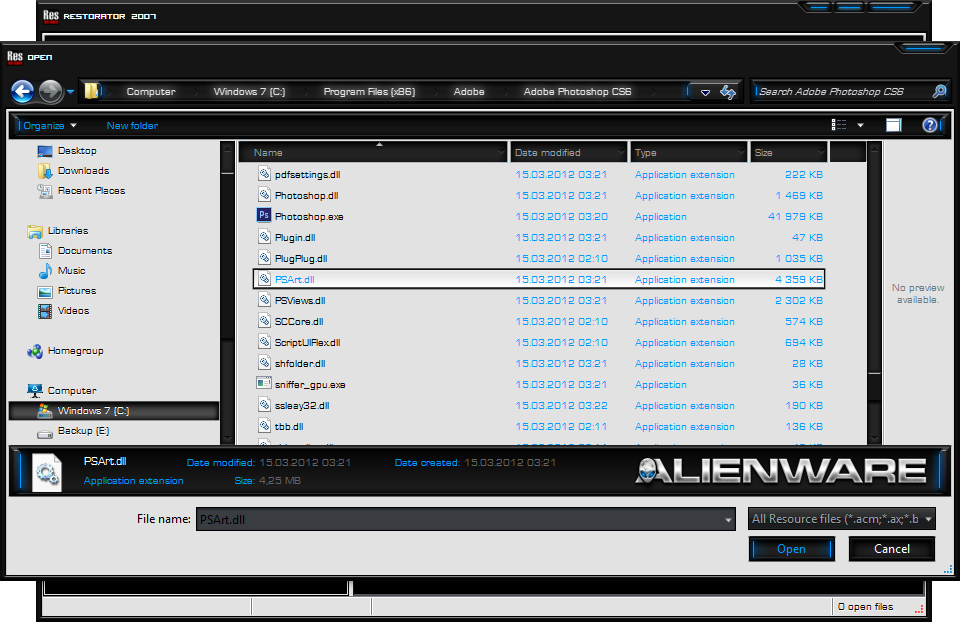
Dont you worry this tutorial will show you how to change the default background and how to add a custom background in Windows Media Player that is shown in Library mode. All you need is a program called Restorator to do this modification/hack.
You can download a free 30-day trial, or you can do as i did and buy it, and supporting the company for further development.
How to change Systemcpl.dll
This tutorial has been tested in Windows 7 but it should also work in Windows Vista and Windows 8.
So without wasting time, lets start the tutorial: 1. The system file which contains System Properties UI resources in Windows 7 is "systemcpl.dll" present in "%windir%\System32\" folder. Here %windir% represents "Windows" directory which can be found in the system drive where Windows is installed. In most of the cases its C:\Windows. First copy systemcpl.dll file from "System32" folder to some other location for example Desktop.
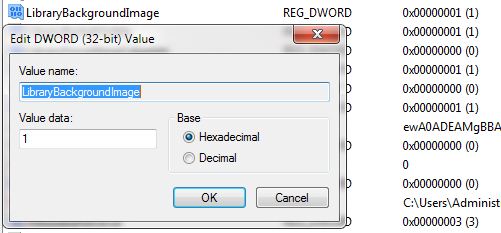
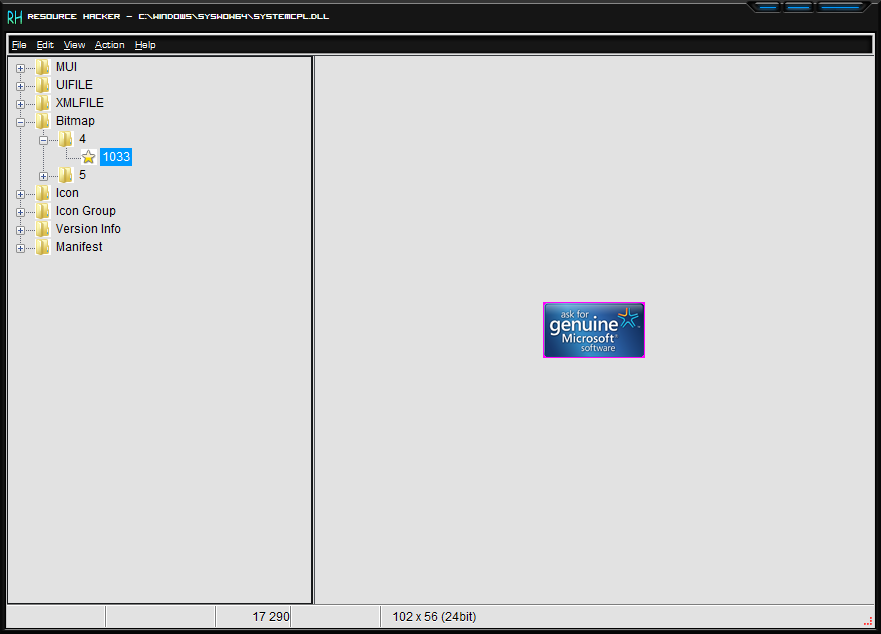
2. Now open the new file in Resource Hacker and go to following key: Bitamp -> 4 -> 1033
3. In right-side pane, you'll get a preview of the image that is applyed in the .dll file
4. When you finish editing/modifying the file, click on save
5. Now we'll need to replace original systemcpl.dll file present in "C:\Windows\System32\" folder with our new systemcpl.dll file which we saved at Desktop or some other location.
6 a. First take ownership of "C:\Windows\System32\systemcpl.dll" file using following tutorial: How to add “Take Ownership”
6 b. Now rename it to "systemcpl_backup.dll" or any other name of your choosing.